


Clean your hands well
Only handle the kit after cleaning and drying your hands.

sample collection Instructions
Follow the steps to collect the sample with the kit sponge on your lower gums and preserve the quality of the DNA.
See step by stepThese steps apply to the buccal swab kit. For blood or another requested sample type, ask our team for the instructions for your test before collecting it.
Request instructions for another sample typeBefore you start
Good sample collection avoids contamination, reduces the need for a new sample and increases the quality of the DNA. In just a few minutes, you can prepare, collect and send it, without leaving home.
Only handle the kit after cleaning and drying your hands.

Do not eat, drink, smoke, chew gum, brush your teeth or use mouthwash.

Set aside the label with your name and date of birth. You will stick it on the tube right after opening the pouch.

Complete and sign the consent form sent with the kit.
Takes up to five minutes
Place the sponge in your mouth carefully: there is a choking hazard. Do not swallow the liquid in the tube; if it gets in your eyes or on your skin, rinse with water.
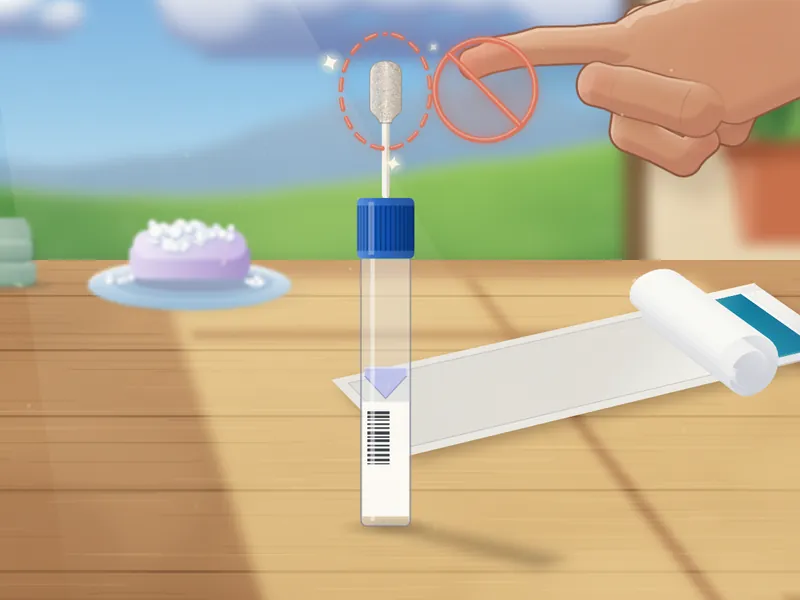
Open the pouch, take out the collector by holding the tube, without touching the sponge, and stick the label with your name on the tube.
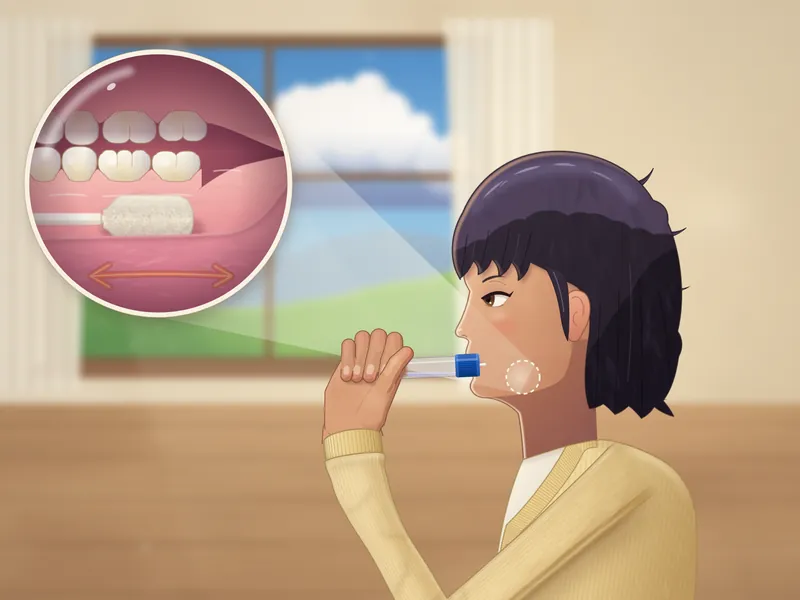
Place the sponge on one side of your mouth, as far back as is comfortable, and gently rub your lower gums 10 times, avoiding your teeth.
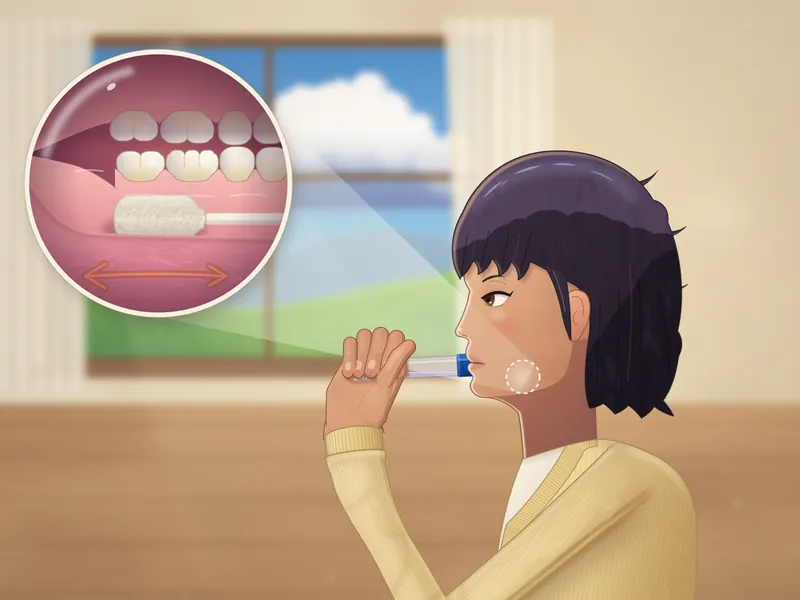
Repeat on the other side of your mouth: 10 more times on the lower gums.
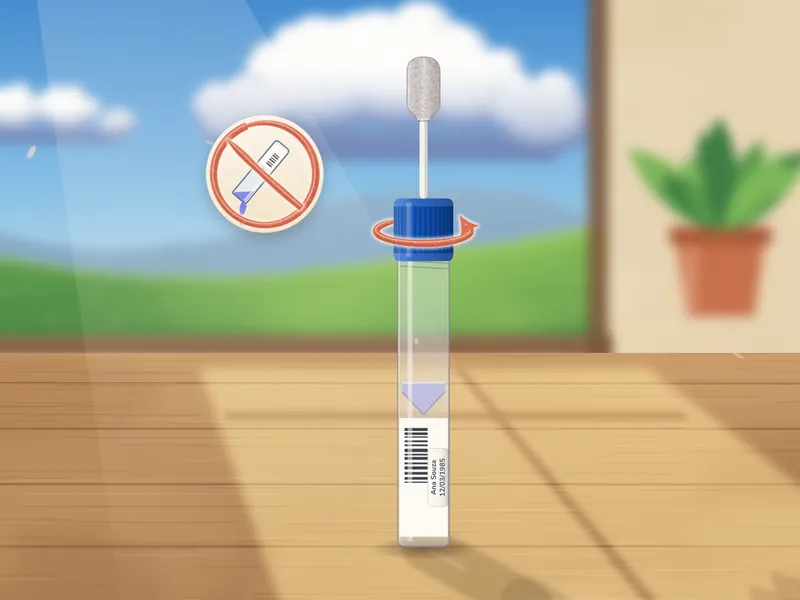
Keeping the tube upright, unscrew the blue cap without touching the sponge.
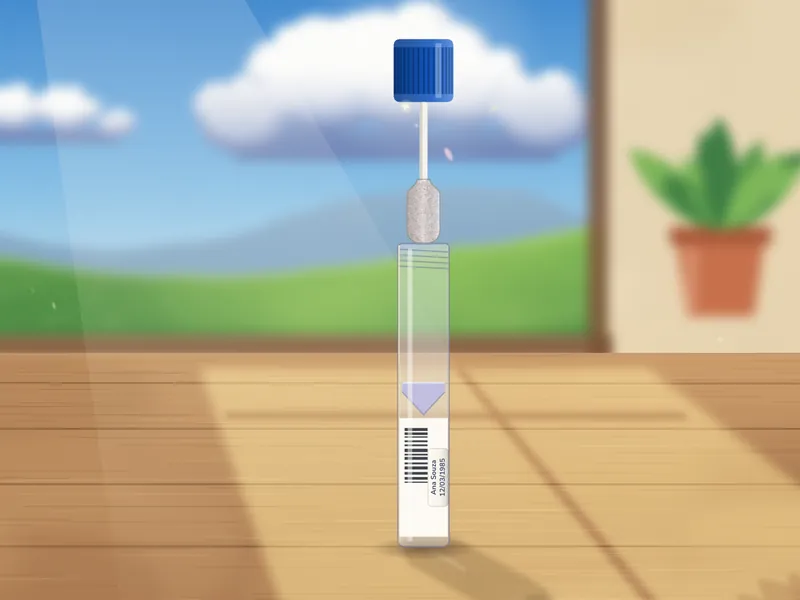
Turn the cap upside down, put the sponge into the tube and close it tightly.
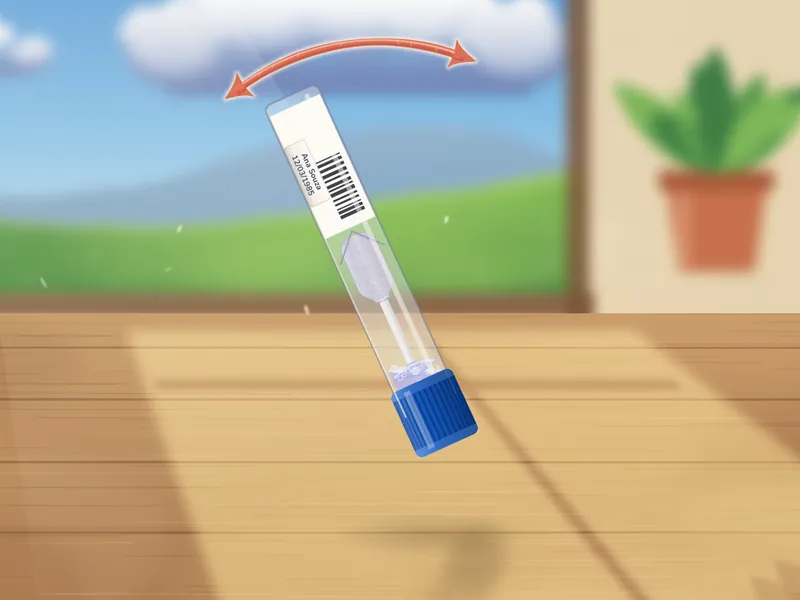
Turn the closed tube upside down and shake it vigorously 15 times.
After sample collection
A quick check helps maintain sample traceability and avoids processing delays.

Check that the cap is tightly closed and that the tube has the label with your name.

Put the tube in the plastic bag and the bag in the box, together with the completed and signed consent form.

Keep the box at room temperature. Do not put it in the refrigerator.

Get in touch to schedule kit pickup.
Need help?
Our team can guide the preparation, identification and sending of the sample.

